
in JDeveloper 12C.
1) Open JDeveloper 12C .
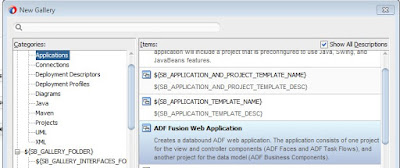
2) Select File =>New=>Application.
3) From the Item list at right side ADF Fusion Web Application.
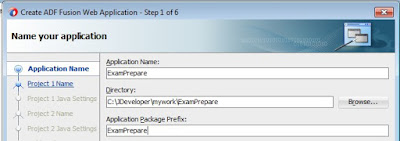
4) Write the Application name and Application Package prefix . Click on Next.
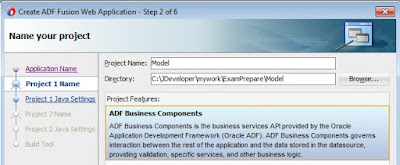
5) By Default it displays the Project Name and Directory. Select ADF Business Components .
Click on Next.
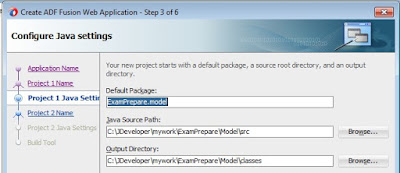
6) It displays the Default package information, Java Source path and Output directory. Click on Next
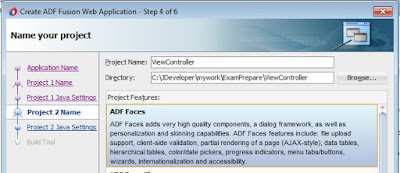
7) It displays the project name as ViewController and the directory path. Select ADF Faces.Click on Next.
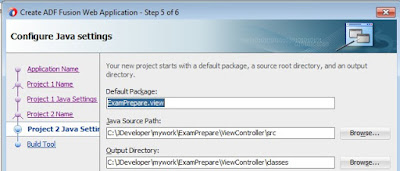
8) It displays the default package information for ViewController. Click on Next
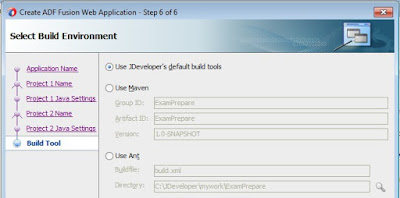
9) By Default it selects Use Jdeveloper’s default build tools radio button. Click on Finish.
10) Fusion web Application quick start check list will be opened and it shows step by step instructions
to build the application.

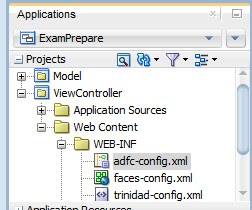
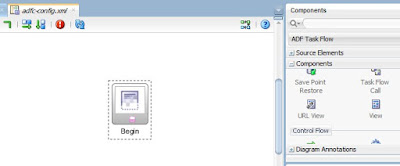
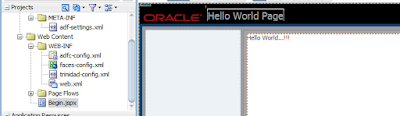
11) Expand the ViewController =>Web Content=>WEB-INF and Click on adfc-config.xml
12) Drag the View component from right side to the adfc-config.xml page and rename it. Double click on the Component.
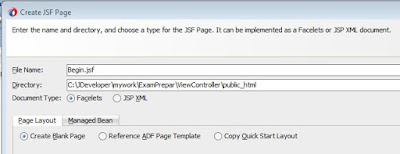
13) Below page will be appeared.
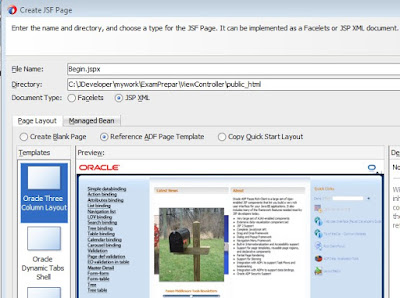
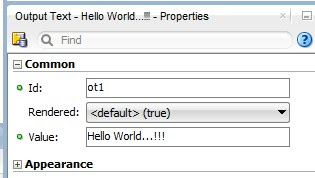
14) Select JSP XML radio button and the radio button Reference ADF Page Template and Click on ok.
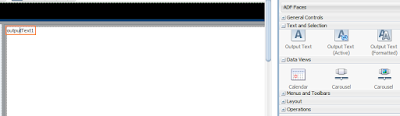
15) Expand text and selection from ADF Faces from Right Side. Select Output Text and drag it to the JSPX page.
16) Re-name that output textbox to HelloWorld …!!!
17) Type the header name to Hello World Page.
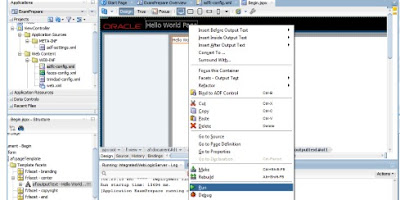
18) Click on save All . Right click on JSPX page and click on Run.
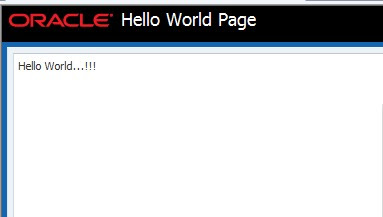
19) The output will be as below.
No comments:
Post a Comment